使用Weaviate和Gemini API实现个性化描述生成
技术背景
传统电商商品描述依赖人工撰写或模板填充,难以规模化且缺乏个性化。向量数据库让语义检索成为可能,而大语言模型能基于商品图片与文本生成自然语言描述。Weaviate 作为开源向量数据库,内置 text2vec-palm 与 generative-palm 模块,可直接对接 Gemini API,把嵌入、检索、生成、回写整合到同一数据层。该方案适用于电商推荐、广告文案生成、知识图谱构建等场景。主要限制在于需要付费层级的 Gemini API 速率限制,Embedded 模式停止终端即断开,且生成质量受提示词与模型版本影响。
核心原理
核心原理是向量化与语义相似度检索。Weaviate 在写入对象时调用 text-embedding-004 生成向量并存储,查询时用 near_text 将查询文本向量化后做近邻搜索。混合搜索结合 BM25 关键词与向量相似度,通过 alpha 参数调节权重。autocut 依据结果分数显著跳变自动截断,避免硬编码 limit。生成式反馈循环指把 Gemini 生成的描述写回 generated_description 属性,使其可被再次检索。个性化阶段通过交叉引用把 Personalized 集合同时指向 Products 与 Personas,形成有向知识图谱,再用 Gemini 结合商品描述与画像描述生成定制文案。
架构分析
系统由三层组成:数据层为 Weaviate 集群,包含 Products、Personas、Personalized 三个集合,每个集合配置向量化器与生成模块;模型层为 Gemini API,提供 text-embedding-004 嵌入与 gemini-3.8-flash 生成能力;应用层为 Python 客户端,负责批量导入、查询、生成与回写。关键设计决策包括:用 Embedded 模式降低实验门槛,用 batch.dynamic 提升导入吞吐,用 autocut 替代固定 limit 提升召回质量,用交叉引用而非冗余字段维护实体关系,用生成式反馈循环让 LLM 输出成为可检索资产。
完整实战教程
##### 版权所有 2026 Google LLC。
# @title Licensed under the Apache License, Version 2.0 (the "License");
# you may not use this file except in compliance with the License.
# You may obtain a copy of the License at
#
# https://www.apache.org/licenses/LICENSE-2.0
#
# Unless required by applicable law or agreed to in writing, software
# distributed under the License is distributed on an "AS IS" BASIS,
# WITHOUT WARRANTIES OR CONDITIONS OF ANY KIND, either express or implied.
# See the License for the specific language governing permissions and
# limitations under the License.
使用 Weaviate 和 Gemini API 实现个性化产品描述

注意: 本笔记本需要付费层级的速率限制才能正常运行。(更多详情请参阅定价)。
Weaviate 是一个开源向量数据库,可让您使用 Gemini API 构建 AI 驱动的应用程序!本笔记本包含四个部分:
在本演示中,您将学习如何嵌入数据、运行语义搜索、向 Gemini API 发起生成式调用并将输出存储到向量数据库中,以及根据用户画像个性化描述。
用例
您将使用一个包含 Google 周边商品的电子商务数据集。您将把数据加载到 Weaviate 向量数据库中,并使用语义搜索功能检索数据。接下来,您将生成产品描述,并将其连同向量嵌入一起存回数据库以供检索(即生成式反馈循环)。最后,您将为买家画像 Alice 和 Bob 创建一个包含独特生成产品描述的小型知识图谱。
要求
您需要一个正在运行的 Weaviate 集群和 Gemini API 密钥。您将在完成本笔记本的过程中设置这些要求!
- Weaviate 向量数据库
- 无服务器
- 嵌入式
- 本地(Docker)
- Gemini API 密钥
- 通过 AI Studio 创建 API 密钥
视频
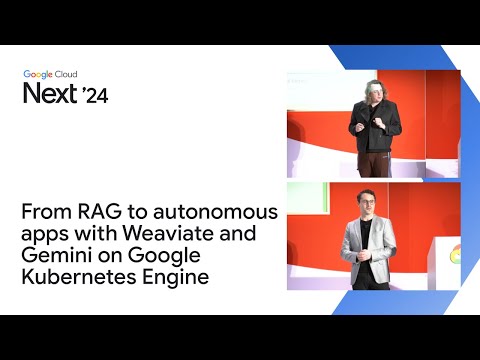
如需观看本演示的精彩讲解,请查看来自 Google Cloud Next 的这个演讲!
安装依赖项和库
%pip install weaviate-client==4.7.1
%pip install -U -q "google-genai>=2.9.0"
%pip install requests
%pip install 'protobuf>=5'
import weaviate
from weaviate.classes.config import Configure
from weaviate.embedded import EmbeddedOptions
import weaviate.classes as wvc
from weaviate.classes.config import Property, DataType, ReferenceProperty
from weaviate.util import generate_uuid5
from weaviate.classes.query import QueryReference

import os
import json
import requests
import PIL
import IPython

from PIL import Image
from io import BytesIO
from IPython.display import Markdown

# Convert image links to PIL object
def url_to_pil(url):
    response = requests.get(url)
    return Image.open(BytesIO(response.content))

# display images
def display_image(url, size=100):
    response = requests.get(url)
    image_data = BytesIO(response.content)
    image = Image.open(image_data)

    resized_image = image.resize((size,size))

    display(resized_image)
第 1 部分:连接到 Weaviate、定义 Schema 并导入数据
连接到 Weaviate
你需要创建一个 Weaviate 集群。有几种方法可以实现:
- Weaviate Embedded:在你的运行时中运行 Weaviate
- Weaviate Cloud:在我们的托管服务上创建一个沙盒。你需要将其部署在美国西部、美国东部或澳大利亚。
- 本地主机:Docker 或 Kubernetes
完整的安装选项列表,请参见此页面。
Weaviate Embedded
你将默认使用 Weaviate Embedded。它会在你的 notebook 中运行 Weaviate,非常适合快速实验。
注意:一旦你停止终端,它就会断开连接。
设置你的 API 密钥
要运行以下单元格,你的 Gemini API 密钥必须存储在 Colab Secret 中,并命名为 GEMINI_API_KEY。如果你还没有 API 密钥,或者不确定如何创建 Colab Secret,请参阅 Authentication 快速入门以获取示例。
from google import genai
from google.colab import userdata

GEMINI_API_KEY = userdata.get("GEMINI_API_KEY")
gemini_client = genai.Client(api_key=GEMINI_API_KEY)
client = weaviate.WeaviateClient(
    embedded_options=EmbeddedOptions(
        version="1.25.10",
        additional_env_vars={
            "ENABLE_MODULES": "text2vec-palm, generative-palm"
        }),
        additional_headers={
            "X-Google-Studio-Api-Key": GEMINI_API_KEY
        }
)

client.connect()
其他选项:Weaviate Cloud 和本地主机
Weaviate Cloud
你可以将 notebook 连接到无服务器 Weaviate 集群,以便将数据持久保存在云端。你可以在此处注册并创建一个免费的 14 天沙盒!
要连接到你的 WCD 集群:
WCD_URL = "https://sandbox.gcp.weaviate.cloud"
WCD_AUTH_KEY = "sk-key"
GEMINI_API_KEY = "sk-key"

client = weaviate.connect_to_wcs(
    cluster_url=WCD_URL,
    auth_credentials=weaviate.auth.AuthApiKey(WCD_AUTH_KEY),
    headers={"X-Google-Studio-Api-Key": GEMINI_API_KEY},
)

print(client.is_ready())
本地主机
如果你想自己运行 Weaviate,可以下载 Docker 文件,并在本地机器或云端运行。此文件夹中还有一个 yaml 文件可供使用。
要连接到本地的 Weaviate:
client = weaviate.connect_to_local()

print(client.is_ready())
创建 schema
schema 告诉 Weaviate 你希望如何存储数据。
你首先需要创建两个集合:Products 和 Personas。每个集合都有元数据(属性),并指定嵌入模型和语言模型。
在第 4 部分中,你将创建另一个集合 Personalized,它会根据 persona 生成产品描述。
# This is optional to empty your database
result = client.collections.delete("Products")
print(result)
result = client.collections.delete("Personas")
print(result)
PROJECT_ID = "" # leave this empty
API_ENDPOINT = "generativelanguage.googleapis.com"
embedding_model = "text-embedding-004" # embedding model
generative_model = "gemini-3.8-flash" # language model

# Products Collection
if not client.collections.exists("Products"):
  collection = client.collections.create(
    name="Products",
    vectorizer_config=Configure.Vectorizer.text2vec_palm
    (
        project_id=PROJECT_ID,
        api_endpoint=API_ENDPOINT,
        model_id = embedding_model
    ),
    generative_config=Configure.Generative.palm(
        project_id=PROJECT_ID,
        api_endpoint=API_ENDPOINT,
        model_id = generative_model
    ),
    properties=[ # properties for the Products collection
            Property(name="product_id", data_type=DataType.TEXT),
            Property(name="title", data_type=DataType.TEXT),
            Property(name="category", data_type=DataType.TEXT),
            Property(name="link", data_type=DataType.TEXT),
            Property(name="description", data_type=DataType.TEXT),
            Property(name="brand", data_type=DataType.TEXT),
            Property(name="generated_description", data_type=DataType.TEXT),
      ]
  )

# Personas Collection
if not client.collections.exists("Personas"):
  collection = client.collections.create(
    name="Personas",
    vectorizer_config=Configure.Vectorizer.text2vec_palm
    (
        project_id=PROJECT_ID,
        api_endpoint=API_ENDPOINT,
        model_id = embedding_model
    ),
    generative_config=Configure.Generative.palm(
        project_id=PROJECT_ID,
        api_endpoint=API_ENDPOINT,
        model_id = generative_model
    ),
    properties=[ # properties for the Personas collection
            Property(name="name", data_type=DataType.TEXT),
            Property(name="description", data_type=DataType.TEXT),
      ]
  )
导入对象
# URL to the raw JSON file
url = 'https://raw.githubusercontent.com/bkauf/next-store/main/first_99_objects.json'
response = requests.get(url)

# Load the entire JSON content
data = json.loads(response.text)
# Print first object
data[0]
上传到 Weaviate
为确保一切就绪,你将只上传一个对象并确认它已在数据库中。
products = client.collections.get("Products")

first_object = data[0]

products.data.insert(
    properties={
        "product_id": first_object['product_id'],
        "title": first_object['title'],
        "category": first_object['category'],
        "link": first_object['link'],
        "description": first_object['description'],
        "brand": first_object['brand']
    }
)

response = products.aggregate.over_all(total_count=True)
print(response.total_count) # This should output 1
让我们导入数据集的剩余部分。你将使用 Weaviate 的批量导入功能将这 98 个对象导入到我们的数据库中。
products = client.collections.get("Products")

remaining_data = data[1:]

with products.batch.dynamic() as batch:
  for item in remaining_data:
    batch.add_object(
      properties={
        "product_id": item['product_id'],
        "title": item['title'],
        "category": item['category'],
        "link": item['link'],
        "description": item['description'],
        "brand": item['brand']
    }
  )

response = products.aggregate.over_all(total_count=True)
print(response.total_count) # this should print 99
# print the first object uuid and properties to analyze how data is structured
first_product = next(products.iterator())
print(first_product.uuid,"\n", json.dumps(first_product.properties, indent=4))
你将通过创建的 UUID 来获取该对象。它还会打印出向量嵌入!
product = products.query.fetch_object_by_id(
    first_product.uuid,
    include_vector=True
)

print(f"Product: {product.properties['title']}")
print(f"Vector Dimensionality: {len(product.vector['default'])}")
print(f"Vector Preview: {product.vector['default'][:50]} ...")
第 2 部分:向量搜索
向量搜索
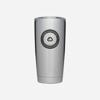
向量搜索返回与查询向量最相似的对象。你将使用 near_text 操作符来查找与输入文本向量最接近的对象。
products = client.collections.get("Products")

response = products.query.near_text(
        query="travel mug",
        return_properties=["title", "description", "link"], # only return these 3 properties
        limit=3 # limited to 3 objects
)

for product in response.objects:
    print(json.dumps(product.properties, indent=2))
    display_image(product.properties['link'])
    print('===')


混合搜索
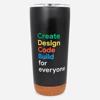
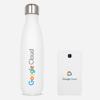
混合搜索将关键词(BM25)搜索与向量搜索结合在一起,让你兼得两种算法的优势。
要在 Weaviate 中使用混合搜索,你只需定义 alpha 参数来确定权重。
alpha = 0 --> 纯 BM25
alpha = 0.5 --> 一半 BM25,一半向量搜索
alpha = 1 --> 纯向量搜索
products = client.collections.get("Products")

response = products.query.hybrid(
    query = "dishwasher safe container", # query
    alpha = 0.75, # leaning more towards vector search
    return_properties=["title", "description", "link"], # return these 3 properties
    limit = 3 # limited to only 3 objects
)

for product in response.objects:
    print(json.dumps(product.properties, indent=2))
    display_image(product.properties['link'])
    print('===')

Autocut
与硬编码对象数量限制(见上文)不同,可以使用 autocut 功能来截断结果集。Autocut 根据结果集指标(如向量距离或分数)的显著变化来限制返回的结果数量。
要使用 autocut,必须指定 auto_limit 参数,该参数将在达到指定数量的变化或“跳跃”后停止返回结果。
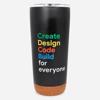
你将使用与上述相同的混合搜索查询,但使用 auto_limit 而不是 limit。注意,在这种情况下实际上检索到了 4 个对象,而之前的查询返回了 3 个对象。
# auto_limit set to 1

products = client.collections.get("Products")

response = products.query.hybrid(
    query = "dishwasher safe container", # query
    alpha = 0.75, # leaning more towards vector search
    return_properties=["title", "description", "link"], # return these 3 properties
    auto_limit = 1 # autocut after 1 jump
)

for product in response.objects:
    print(json.dumps(product.properties, indent=2))
    display_image(product.properties['link'])
    print('===')
筛选器
通过向查询添加筛选器来缩小结果范围。
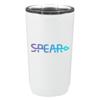
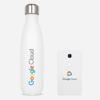
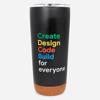
查找 category 等于 drinkware 的对象。
products = client.collections.get("Products")

response = products.query.near_text(
    query="travel cup",
    return_properties=["title", "description", "category", "link"], # returned properties
    filters=wvc.query.Filter.by_property("category").equal("Drinkware"), # filter
    limit=3, # limit to 3 objects
)

for product in response.objects:
    print(json.dumps(product.properties, indent=2))
    display_image(product.properties['link'])
    print('===')
第 3 部分:生成式反馈循环
生成式反馈循环 指的是将语言模型的输出存回数据库的过程。
你将使用 Gemini API 为数据库中的每个产品生成描述,并将其保存到 Products 集合中的 generated_description 属性。
连接并配置 Gemini API 模型
请确保您已初始化 Gemini 客户端。请确认此步骤已在第 1 部分中完成。
生成描述并将其存储到 Products 集合中
以下单元格的步骤:
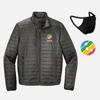
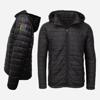
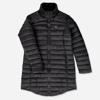
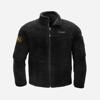
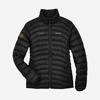
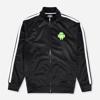
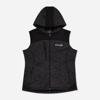
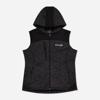
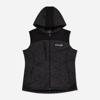
- 运行向量搜索查询以查找旅行夹克
* 在此处了解有关 autocut(auto_limit)的更多信息。
- 获取返回的对象,将任务和图像提示给 Gemini API,并将描述存储到
generated_description属性中
response = products.query.near_text( # first find travel jackets
    query="travel jacket",
    return_properties=["title", "description", "category", "link"],
    auto_limit=1, # limit it to 1 close group
)

for product in response.objects:
    if "link" in product.properties:
        id = product.uuid
        img_url = product.properties["link"]

        pil_image = url_to_pil(img_url) # convert image to PIL object
        generated_description = gemini_client.models.generate_content(
            model="gemini-3.8-flash",
            contents=[
                "Write a short Facebook ad about this product photo.",
                pil_image
            ]
        ) # prompt to the Gemini API
        generated_description = generated_description.text
        display_image(product.properties['link'])
        print(generated_description)
        print('===')

        # Update the Product collection with the generated description
        products.data.update(
            uuid=id,
            properties={"generated_description": generated_description}
        )
在 generated_description 属性上进行向量搜索
由于产品描述已保存在我们的 Products 集合中,你可以对其运行向量搜索查询。
products = client.collections.get("Products")

response = products.query.near_text(
        query="travel jacket",
        return_properties=["generated_description", "description", "title"],
        limit=1
    )

for o in response.objects:
    print(o.uuid)
    print(json.dumps(o.properties, indent=2))
第 4 部分:个性化
到目前为止,你已经使用 gemini-3.7-flash 模型通过 Gemini API 生成了产品描述。在第 4 部分中,你将生成针对用户画像量身定制的产品描述。
你将使用交叉引用来建立 Products 和 Personas 集合之间的有向关系。
result = client.collections.delete("Personalized")
print(result)
PROJECT_ID = "" # leave this empty
API_ENDPOINT = "generativelanguage.googleapis.com"
embedding_model = "text-embedding-004" # embedding model
generative_model = "gemini-3.8-flash"

# Personalized Collection

if not client.collections.exists("Personalized"):
  collection = client.collections.create(
    name="Personalized",
    vectorizer_config=Configure.Vectorizer.text2vec_palm(
        project_id=PROJECT_ID,
        api_endpoint=API_ENDPOINT,
        model_id = embedding_model
    ),
    generative_config=Configure.Generative.palm(
        project_id=PROJECT_ID,
        api_endpoint=API_ENDPOINT,
        model_id = generative_model
    ),
    properties=[
            Property(name="description", data_type=DataType.TEXT),
    ],
    # cross-references
    references=[
        ReferenceProperty(
            name="ofProduct",
            target_collection="Products" # connect personalized to the products collection
        ),
        ReferenceProperty(
            name="ofPersona",
            target_collection="Personas" # connect personalized to the personas collection
        )
    ]
)
创建两个角色(Alice 和 Bob)
personas = client.collections.get("Personas")

for persona in ['Alice', 'Bob']:
  generated_description = gemini_client.models.generate_content(
      model="gemini-3.8-flash",
      contents=[
          "Create a fictional buyer persona named "
          + persona + ", write a short description about them"
      ]
  ) # use gemini-3.7-flash to generate persona description
  uuid = personas.data.insert({
    "name": persona,
    "description": generated_description.text
  })
  print(uuid)
  print(generated_description.text)
  print("===")
# print objects in the Personas collection

personas = client.collections.get("Personas")

for persona in personas.iterator():
    print(persona.uuid, persona.properties)
为人物画像生成定制化的产品描述
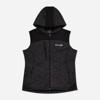
从第 1 部分获取产品 uuid 并粘贴到下方
personalized = client.collections.get("Personalized")

product = products.query.fetch_object_by_id(product.uuid)
display_image(product.properties['link'])

personas = client.collections.get("Personas")

for persona in personas.iterator():
    generated_description = gemini_client.models.generate_content(
        model="gemini-3.8-flash",
        contents=[
            """
              Create a product description tailored to the following person,
              make sure to use the name (
            """,
            persona.properties["name"],") of the persona.\n\n",
            "# Product Description\n",
            product.properties["description"], "# Persona",
            persona.properties["description"]]
    ) # generate a description tailored to the persona
    print(generated_description.text)
    print('====')
    # Add the personalized description to the `description` property in the Personalized collection
    new_uuid = personalized.data.insert(
        properties={
            "description": generated_description.text },
        references={
            "ofProduct": product.uuid, # add cross-reference to the Product collection
            "ofPersona": persona.uuid # add cross-reference to the Persona collection
        },
    )
获取 Personalized 集合中的对象
personalized = client.collections.get("Personalized")

response = personalized.query.fetch_objects(
    limit=2,
    return_references=[QueryReference(
            link_on="ofProduct", # return the title property from the Product collection
            return_properties=["title", "link"]
        ),
        QueryReference(
            link_on="ofPersona",
            return_properties=["name"] # return the name property from the Persona collection
        )
    ]
)

for item in response.objects:
    print(item.properties)
    for ref_obj in item.references["ofProduct"].objects:
        print(ref_obj.properties)
    for ref_obj in item.references["ofPersona"].objects:
        print(ref_obj.properties)
    display_image(product.properties['link'])
    print("===")
笔记本回顾
在本笔记本中,你学习了如何:
- 使用 Embedded 创建 Weaviate 集群
- 定义 Weaviate schema 并选择嵌入模型和生成模型
- 连接到 Gemini API
- 执行带过滤和 autocut 的向量搜索和混合搜索
- 使用生成反馈循环(Generative Feedback Loops)将语言模型的输出存回数据库,以供将来检索
- 使用交叉引用(cross-references)在集合之间建立关系
你可以通过我们的文档进一步了解 Weaviate,并且可以在这里找到更多 Weaviate 和 Google 的 cookbook!
作者:Erika Cardenas 和 Bob Van Luijt
欢迎与我们联系,如有任何问题请告诉我们!
Erika 的账号:
* 在 X 上关注
Bob 的账号:
* 在 X 上关注
常见问题
常见错误包括:GEMINI_API_KEY 未存入 Colab Secret 导致认证失败;Weaviate Embedded 版本与模块名不匹配导致连接异常;批量导入时未等待完成就查询导致计数不符;near_text 返回空结果通常是嵌入模型未正确配置;交叉引用查询时未指定 return_references 导致引用为空。排查方法:先用 client.is_ready() 确认连接,用 aggregate.over_all(total_count=True) 校验数据量,用 fetch_object_by_id(include_vector=True) 检查向量维度。生产环境建议改用 Weaviate Cloud 或 Docker 持久化,增加重试与限流,对生成结果做缓存与人工审核,并监控 API 配额。
企业应用扩展
可扩展方向包括:引入多模态嵌入对商品图片直接向量化;用 RAG 将检索结果注入生成提示词提升事实一致性;为 Personalized 集合增加反馈评分属性,形成闭环优化;用 Kubernetes 部署 Weaviate 并配置副本与分片;将 Gemini 调用封装为异步任务队列,避免阻塞主流程;结合用户行为日志动态更新画像,实现实时个性化。更多示例可参考 Weaviate 官方文档与 Google cookbook 仓库。
总结
本教程面向有编程基础的开发者,讲解如何用 Weaviate 向量数据库与 Gemini API 构建个性化商品描述生成系统。内容涵盖 Weaviate 集群连接、Schema 定义、数据批量导入、向量搜索与混合搜索、autocut 与筛选器、生成式反馈循环,以及通过交叉引用构建 Products、Personas、Personalized 三集合知识图谱。读者将掌握嵌入、语义检索、LLM 生成回写与用户画像定制的完整工程链路,并了解常见错误与生产优化方向。
- --
内容来源与验证
- 内容等级:PREMIUM_A
- 质量等级:S_CANDIDATE
- 难度:中级
- 验证等级:V1
- 原文作者:
- 原文日期:
- 来源许可:Apache-2.0
- 来源版本:
4df31b2e0d52b8e0a24fa961cdd67201da4c7c97 - 查看原文
站内还有更多完整实战教程
加入会员,解锁全部教程、完整代码与持续更新内容。
加入会员